Tuesday, March 2, 2010

Sketching with Dr. Seuss : Hardback Sketchbook Tutorial

As a birthday tribute to Dr. Seuss (and because we had some Dr. Seuss book covers lying around from a different project) we decided to make some Dr. Seuss Sketch books. I have created a quick tutorial for you to make these at home.
You will need:
An old hardback book (check out your local thrift store)
Paper
3 hole punch or hand held punch
utility knife and ruler or scissors
Paper cutter (or one of the cutting tools above)
Drill and a 7/32 bit
Scrap block of wood or thick stack of scrap paper
Yarn/twine or metal book rings (they come in various sizes)
Large eyed needle (optional)


STEP 1: First you will need to remove the pages from the hardback book you have selected and cut out the spine. If the original pages are sewn into the book you can snip the twine found at the center page using a sharp pair of scissors or your utility blade and remove all the pages at once. If the pages are glued into the spine, you can cut them out right along with the spine of the book using your ruler and utility knife. Set book pages aside for another project.


STEP 2: Gather the paper you have chosen for the guts of the book and cut down to about 1/4 inch shorter, (vertically and horizontally) than the book over itself. This will give you a nice border when your stack of paper is centered on the inside of the covers. (Our book covers were about 6 ½” x 9 ¼” so we cut our paper to 6 ¼” x 9”). Next you will want to punch holes in the long edge using a 3 hole paper puncher or a hand held punch.


STEP 3: Line up and center one of the papers you just punched near the edge of the book cover. With a pen mark where the book shows though the holes this will be your drill markings. Place the cover on top of a piece of scrap wood and drill through the marking you just made. Repeat this step for all holes and the back cover. If you don’t want to bother with a drill or if you want to get really fancy, you could take the covers to a copy center like Fed Ex Office and they can drill these for you. If you choose this alternative, have them drill your pre-cut paper while you’re at it.


STEP 4: Now for binding. The easy way of doing this is to use metal book rings which come in many sizes. They pull open and squeeze close which makes it easy to remove and add pages to your sketch book. (The image above is sketchbook a friend of mine made for me and it depicts this method).


If you don’t want to have to buy these rings you can always use twine or yarn to tie your book together which is what we did for ours. We did this by inserted the yarn through both ends of facing holes. Then we crossed our yarn strands and stuck it through the hole opposite of the hole it was coming through (one end at a time). We stuck the yarn back through its original hole, double knotted it and snipped off the excess. If you choose to go this route when binding your own books, just make sure the book is able to lay flat with the spine lightly touching when you are knotting the thread, otherwise you could bind too tightly causing the paper to get stuck or tear as you turn the pages.


STEP 5: Get sketching!

I hope you have fun trying this simple project at home. Also, if the original paper you have removed from your book is still in good shape you may want to frame some of your favorite illustrations for instant home decor. Otherwise you could use the scraps to make envelopes, gift tags, postcards…the list goes on and on. What ideas are you brewing up?
Friday, February 19, 2010

Very Literal Love Notes


We pulled out the origami paper, alphabet stamper and ink to create some very literal love notes for Valentine’s Day.

This was the easiest valentine project ever since Hendrix (age 4) was able to create these notes all by himself by stamping the simple message, “love” on some pretty paper.


In each envelope he also added two heart shaped crayons which we made from old broken crayons, a silicone heart mold and oven.


(For our size of mold it took about 35 minutes for the crayons to melt down entirely with the oven set at 250 degrees).

Although valentines is over the message and crayons live on. Send your sweetie a love note today!

Thursday, February 18, 2010

Sweet Talk: DIY Conversation Hearts

After purchasing our customary bag of conversations hearts for this month of love, I began to wonder how much research it would take to come up with a homemade version of these little candy treasures.

I decided to ask internet to help me investigate the possibilities of this task. As usual, Internet came throughand provided me with the perfect
recipe and photo tutorial for making these famous treats from scratch.

I helped Hendrix and a little girlfriend of his make these over the Valentines weekend but I think it would make a fun anytime kitchen activity.

To MAKE THESE at HOME you will:

Mix ½ cup of water and 2 tsp of light corn syrup to one packet or 2 tsp of unflavored gelatin until the gelatin is well-distributed. Microwave the mix for 30 seconds to dissolve the gelatin, stir well.

Add gelatin mixture to a mixing bowl along with 1 cup of powdered sugar. Mix ingredients using the paddle attachment (you can also use a handheld mixer). When the sugar is well blended you will add another cup of powdered sugar and mix until well-blended again. Continue this process until you have added 2 lb of powdered sugar. The dough should be stiff at this point.

Next you will knead the sticky dough on a generously-dusted powdered sugar surface. Roll the dough over itself adding powdered sugar as needed to decrease the stickiness.


When the dough is the right consistency, you can add color and flavoring. We separated our dough into 5 balls for 5 different colors and flavors. We added the color first (lightest color first) and then we added the flavoring extracts using what we had on hand; vanilla, coconut, bubblegum, banana, and cinnamon. The flavoring possibilities are endless.


Finally you will roll your dough and cut using small heat shaped cutters. You can make as thick as you like but you may want to roll out a thinner version of the store bought candy if your cutters are large.


You can place cut out candies on a cookie sheet lined with parchment. Leave treats uncovered on cookie sheet overnight to dry—NO baking necessary!


Once dried you can add you own special message to each heart using food writing makers which you can find in the baking aisle at most craft stores.
If you didn't notice, the ingredients and supply list for this project are the items are in color above. For further details see recipie HERE.

There you have it, your very own conversation hearts!


(top image credit: Brittany...my sister!)

Friday, February 5, 2010

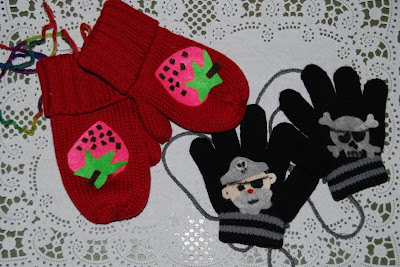
Valentine Love Mitts


Hey there friends! I just shared a valentine tutorial with the readers over at FaveCrafts.com. You can read all about how to make your own I-Love-You-This-Much Love Mitts right HERE.


Oh yeah, and I am also sharing my current 5 favorite blogs on the Fave Crafts blog right HERE.

Saturday, January 30, 2010

Writings on the Wall

Yesterday morning Hendrix woke up and said, “I have a great idea! Let’s wrap ourselves in paper and put paper all over the walls then we can draw on ourselves and everything!”

I wasn’t so sure about the “body wraps.” I envisioned myself imprisoned in a stiff sheet of butcher paper roasting over an indoor campfire, makered-up from head to toe while my kids marched around me sporting loin cloths and tribal body paint. The paper on the wall however, that I was willing to attempt.


So right after breakfast we got out a brown roll of paper and colored chalk to create an imaginary city.


My favorite part is the plethora of fruit falling from the tree in a perfect row (click on photo to enlarge) and the scribbly clouds, I wish they were real

P.S. Since taking these pics, I have made it a goal to have the kids (and myself) dressed before noon.

Thursday, January 28, 2010

Snow Globing!


For our last group make project we made snow globes.

Here’s how we did it (notice ingredients in bold text):

First we wanted to attach our miniatures to the lid of the baby jar. (Miniature trees and snowmen came from the craft store). Rather than gluing the objects directly to the lid, we glued them to a stack of 4 poker chips which I had pre-glued to the lid beforehand (after I had lightly sanded the lid). Our baby jars had a pattern in the glass on one end of the jar which would have distorted our winter scene so having the poker chips as leverage solved that problem.


We used hot glue to attach our objects to the poker chips but I think I would recommend using a waterproof sealant if you want to keep the globe as a real keepsake. The only downside to using glue like this is you might have to wait an hour or two before the next step whereas hot glue dries in seconds.


We set our lid aside while we added distilled water to our baby jar. We filled the jars as much as possible while still allowing the objects to fit inside with no water spilling over. Just before attaching our lid—objects affixed—we added a few pinches of chunky glitter and a drop or two of glycerin. The chunky glitter is easier to see than fine glitter and it is heavy enough to fall to the bottom. The glycerin slows down the speed of the falling glitter (I found this in the supermarket pharmacy by the way). We were careful not to add too much glycerin to avoid clumping up the glitter.

Lastly, we ran a ring of hot glue around the inside of our pre-assembled lid and then screwed it on tightly.


A great project for a last group make if you ask me. Thank you again to all my lovely make supporters! *tear* You guys are the best! I’d love it if you come back to visit the blog periodically as we share our at-home making adventures.

Happy making.

p.s. please excuss my lack of photo documentation!

Saturday, January 16, 2010

Snowy Days Ahead

Hi friends, I hope you all had a great holiday and that you are enjoying the New Year so far!

For the January Make I thought we'd celebrate the season by making our own mini snow globes. The fee for this Make will provide your child with all the supplies necessary but if you'd like your scene to contain something other than a snow covered tree and snowman figure OR if you'd like a globe larger than that of a baby jar sized container then feel free to bring your own plastic miniature trinkets and/or larger jar to assemble.
LET'S MEET: In the church primary room on Friday the 22nd of January at 10am
FEES SHMEES: $2 cash per child/per snow globe

RSVP: On or before the night of Wednesday, January 20th. To do this, leave a comment under this post or send me an email (see sidebar). This will ensure their will be enough supplies for everyone attending.

ALSO: This months Make will complete a years worth of Make activities and it will actually be the very last Make! I am so grateful to everyone who has participated and supported the Make group whether it has been through attending the group or simply taking an interest to the things that have been posted here. I will continue to use this blog to share some of the activities and projects my kids and I are doing in our home as well as some other goodies. And, as always, feel free to submit your own kiddie projects or parental goodies, I'd be more than happy to post all about it or provide a link to your blog regarding the details.

Well that about covers it...Happy Making!

(image credit)
Related Posts with Thumbnails